
I love the versatility of wall stripes. The clean, tailored effect they create is so timeless, stripes can look equally appropriate in both period and contemporary decors... and every style in between.
And with paint, you have virtually unlimited possibilities and complete control over the final result (you decide how bold or subtle, formal or laid back, basic or sophisticated the stripes will be depending on the color combination, direction, size and pattern you choose).
 For example, vertical wall stripes look traditional and classy (unless done in some funky color combo), and help draw the eye up toward the ceiling, creating the illusion of more height in the room.
The optimal size for vertical stripes is usually 6 to 8 inches; wider stripes will look less formal, while smaller ones can get too busy looking if painted on all 4 walls.
To create perfectly vertical stripes, you will need a plumb line (that you can even make yourself in a pinch - with a piece of string and a small weight).
 Horizontal wall stripes look contemporary and casual, and have the effect of "pushing out" the walls, resulting in the illusion of a bigger room.
Horizontal stripes are best sized at about 12 inches or even wider, and require a carpenter's level to lay out.
 Diagonal wall stripes are pretty uncommon and look somewhat exotic. They create an illusion of movement in the room: in fact, the effect is so powerful, this treatment is best limited to only one wall.
For laying out diagonal stripes on a wall, you will need a partner and a snap line.
 Now as far as color combinations for your stripes, here are 3 approaches that always work great:
1) Pull a color combo from something already present in the room - it can be fabric (upholstery, pillows, etc), a painting or a wallpaper border (like Paula did in beautiful Lauren's room below).
This method is as easy as painting by numbers, but do tweak the value and intensity of the colors if needed, to prevent the walls from competing with the inspiration piece.
 2) Using variations of the same paint color is another way to come up with a successful color combination for your wall stripes.
The easiest way to do that is to pick the colors from the same paint strip (neighboring shades will look very subtle, like shadows, when used together, so if you want more visible contrast, keep the colors at least 2 shades apart).
 3) Stripes painted in the same color, but different sheens look utterly elegant and understated. Your walls will almost come to life as the stripes will fade away and reappear, depending on the lighting and the angle from which you view them.
To create the look, all you have to do is apply the base coat in your desired color, and then use clear polyurethane in a satin finish for striping the walls.
 I could go on and on, but all good things must come to an end, they say :) But before I wrap up this post, I want to leave you with these 3 useful tips that might come in handy on your next wall striping project:
- Use only low-tack, blue painter's tape for taping off your stripes. This tape is specifically designed to be used for painting projects like this (unlike masking tape - which is almost guaranteed to rip off your base coat when you remove it).
- After taping off the stripes, use the back of a plastic spoon and press along the edges of the tape to minimize paint seepage. This step is especially important to do if you are re-using the tape (yes you can do that).
- When you want the sharpest, cleanest lines possible, here's the thing to do:
Tape off the stripes, then use a small brush to paint along the edges of the tape with the base coat color. Once that is dry, apply the accent stripe color as usual.
What this little trick will do is help you seal the edges and completely prevent the accent/stripe paint color from seeping under the tape.
Hope this was helpful, and if you need step-by-step instructions for painting stripes or other DIY painting projects, stop by at http://www.housepaintingtutorials.com/ and I'll lead you through the steps!
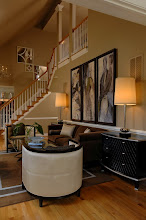
Thank you Yelena for that wonderful post and using Lauren's room as an example. I also used the "utterly elegant and understated" tone on tone in my dining room using ivory. I have always loved it. I'll end with a photo of that room as another example of this subtle technique.


Nice design of walls. Really like it.
ReplyDeleteI'm planning on doing a striped accent wall in my living room soon, so this post was very helpful! I think I'll do flat/glossy horizontal stripes. Wish me luck!
ReplyDelete